利用 Github Actions 来自动构建和部署博客到 Github Pages。这样既可以简化自己的操作,又能保证自己的博客源码的私密性。
Github token#
具体位置为:个人设置界面 -> Developer Settings -> Personal access tokens -> Tokens(classic) 在此界面新生成一个 token,需要勾选 repo 和 workflow 选项。Expiration 可以设置为 No expiration。创建完成后会显示你的 token,它只会显示这一次,你需要将它记下来,后边会用到。。
workflow 文件#
想利用 Github Actions,需要在博客的根目录下创建 .github/workflows/ 文件夹。在该文件夹下创建 yml 文件会被 Github Actions 执行。
我的 workflow 文件如下:
 1
 2
 3
 4
 5
 6
 7
 8
 9
10
11
12
13
14
15
16
17
18
19
20
21
22
23
24
25
26
27
28
29
30
31
32
33
34
35
36
37
38
39
40
41
| name: GitHub Pages
on:
push:
branches:
- main # Set a branch to deploy
release:
types:
- published
jobs:
deploy:
runs-on: ubuntu-20.04
concurrency:
group: ${{ github.workflow }}-${{ github.ref }}
steps:
- uses: actions/checkout@v3
with:
ref: main
- name: Setup Hugo
uses: peaceiris/actions-hugo@v2
with:
hugo-version: '0.119.0'
# 是否启用 hugo extend
# extended: true
- name: Build
run: hugo --minify
- name: Deploy
run: |
cd ./public
git init
git config --global user.name '${{ secrets.GITHUBUSERNAME }}'
git config --global user.email '${{ secrets.GITHUBEMAIL }}'
git add .
git commit -m "${{ github.event.head_commit.message }}"
git push --force --quiet "https://${{ secrets.GITHUBUSERNAME }}:${{ secrets.GITHUBTOKEN }}@github.com/${{ secrets.GITHUBUSERNAME }}/${{ secrets.GITHUBUSERNAME }}.github.io.git" master:main
#git push --force --quiet "https://${{ secrets.TOKENUSER }}:${{ secrets.CODINGTOKEN }}@e.coding.net/${{ secrets.CODINGUSERNAME }}/${{ secrets.CODINGBLOGREPO }}.git" master:master #coding 部署写法,需要的自行取消注释
#git push --force --quiet "https://${{ secrets.GITEEUSERNAME }}:${{ secrets.GITEETOKEN }}@gitee.com/${{ secrets.GITEEUSERNAME }}/${{ secrets.GITEEUSERNAME }}.git" master:master #gitee 部署写法,需要的自行取消注释
|
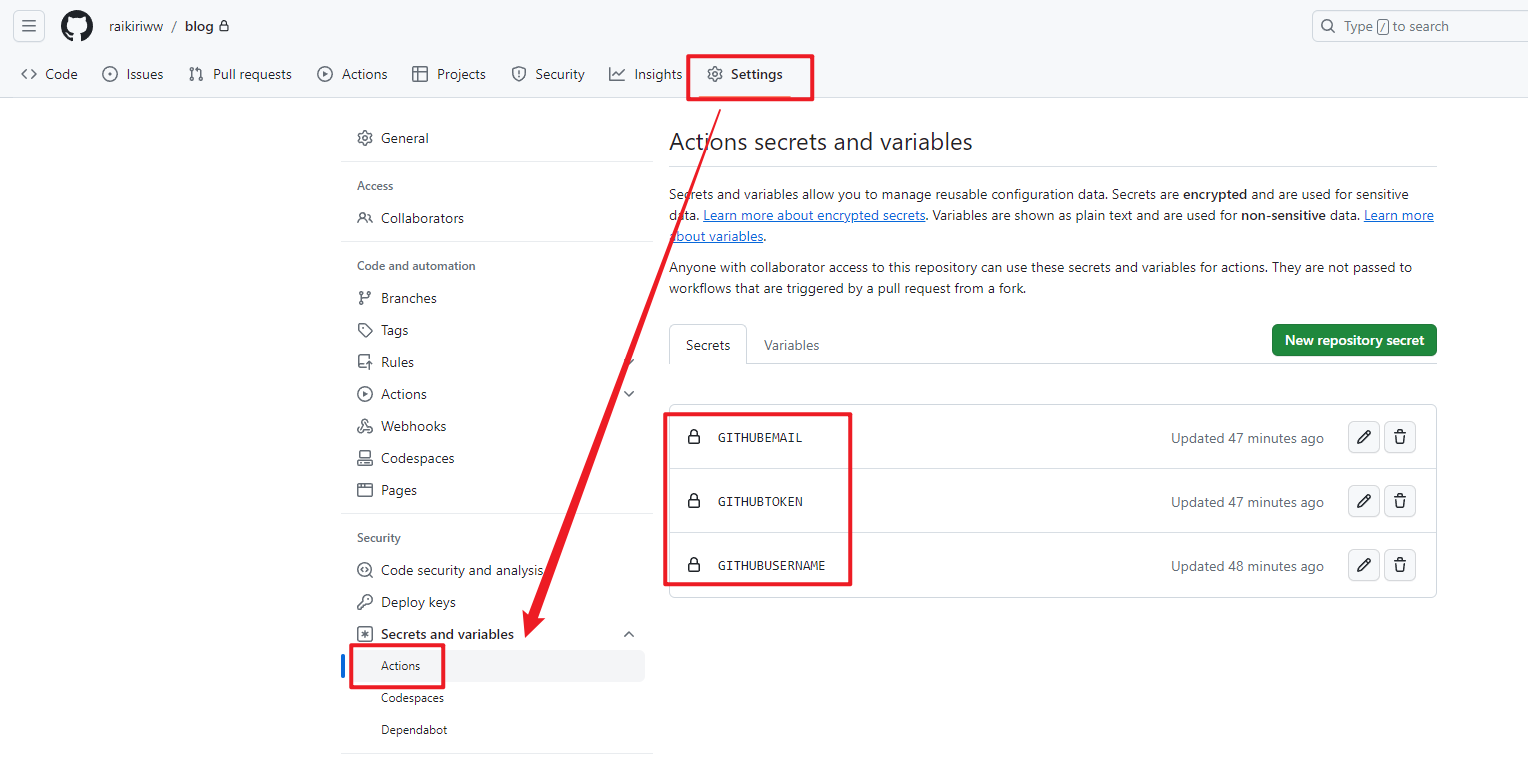
其中,GITHUBUSERNAME ,GITHUBEMAIL , GITHUBTOKEN 三个为自定义变量,后边会讲到。
源码仓库#
新建或使用一个老的仓库,可见性设置为 private。在代码仓库的 Settings 页面找到 Secrets and variables ,点击其中的 Actions ,添加 workflow 中用到的三个变量:GITHUBUSERNAME ,GITHUBEMAIL , GITHUBTOKEN 。

上传代码#
完成上述步骤后即可用 git 提交代码到你的源码仓库,即可在仓库的 Actions 界面看到执行的 workflows。

